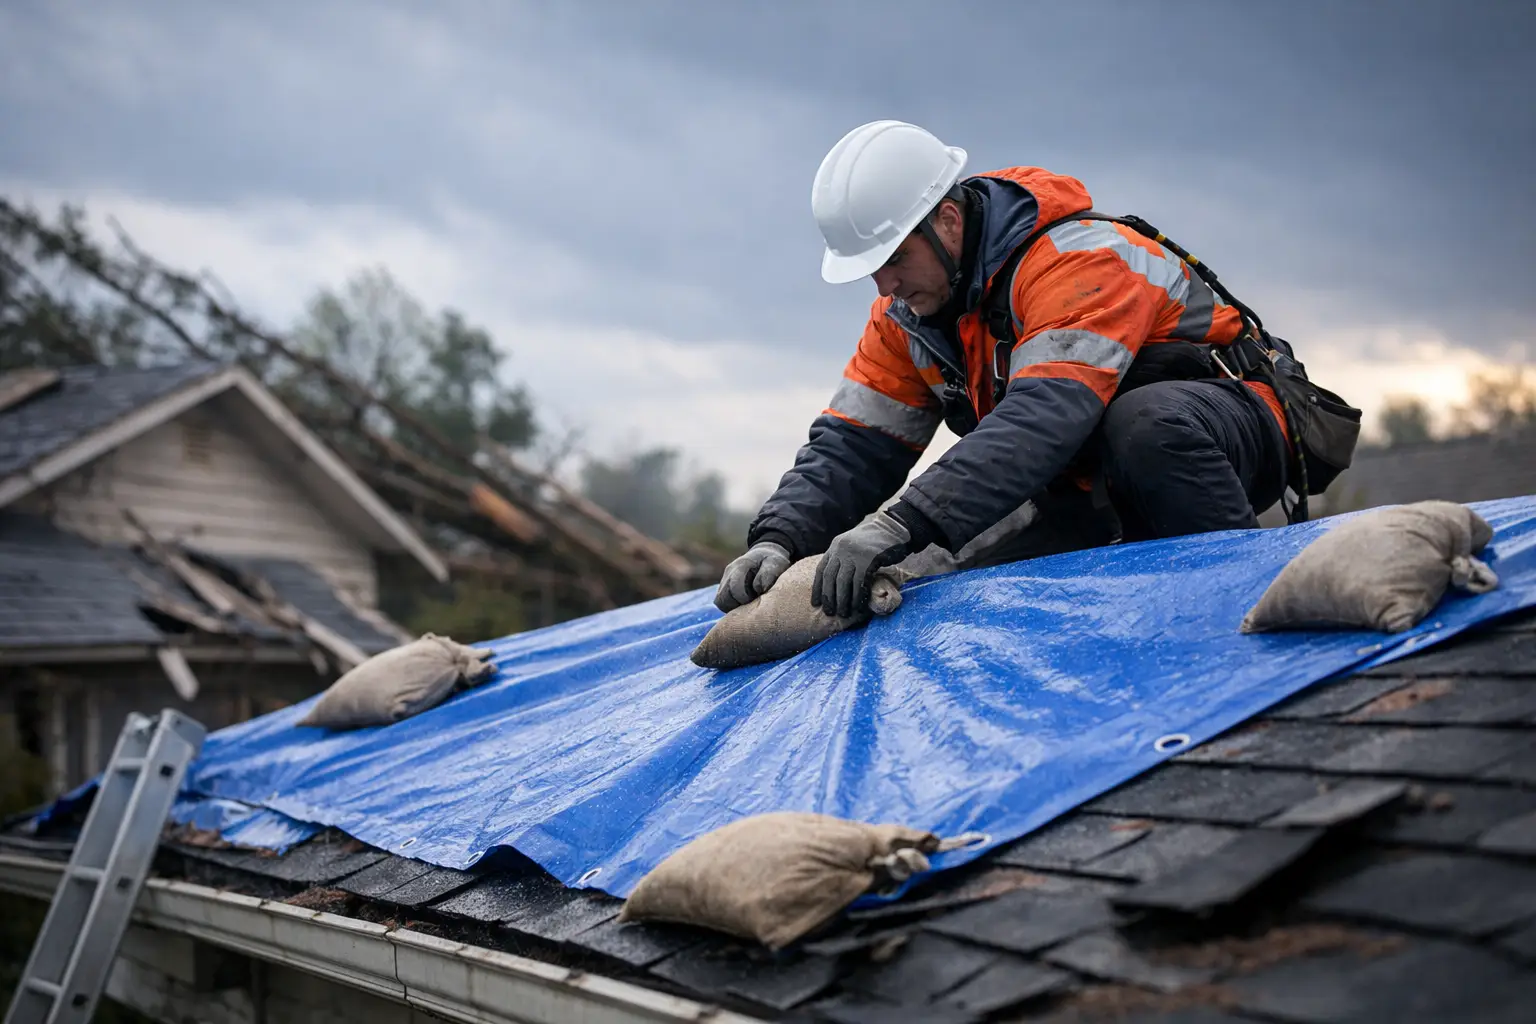


A roof leak that starts during a Connecticut storm can turn a dry attic, finished room, retail space, or office ceiling into an active damage site within hours. Knowing how to handle emergency roof tarping can help limit water intrusion while you arrange a professional repair. The priority is never a perfect-looking temporary cover. It is protecting people, reducing additional damage, and avoiding a dangerous trip onto a wet or unstable roof.
Start With Safety, Not the Tarp
After high winds, falling branches, heavy rain, or ice damage, the roof may be far less stable than it appears from the ground. Broken shingles, loose slate, punctures in rubber roofing, damaged flashing, and saturated roof decking can all create unsafe footing. A tarp is only useful if it can be installed without creating a serious fall risk.
Do not climb onto the roof during rain, snow, lightning, high winds, darkness, or when the roof surface is icy. The same applies if you see sagging decking, downed utility lines, significant structural damage, or a tree resting on the building. Keep everyone away from the affected area and contact emergency services if electrical hazards or structural collapse are possible.
For many homeowners and property managers, the safest emergency response is to control water from inside the building, document the damage from the ground, and call an experienced roofing contractor. This is especially true for steep roofs, slate and cedar roofs, coastal properties exposed to strong winds, and commercial buildings with large or low-slope roof systems.
Control Water Inside the Building First
Before addressing the exterior, take practical steps to prevent interior damage. Move furniture, electronics, inventory, and valuables away from the leak. Place buckets or other containers under active drips, and use towels to keep water from spreading across floors.
If a ceiling is bulging with trapped water, stay clear of the area. A water-filled ceiling can fail without warning. Turn off electricity to the affected room only if it is safe to reach the breaker panel and there is no standing water near electrical equipment. Do not touch wet light fixtures, outlets, ceiling fans, or exposed wiring.
For commercial properties, protect occupied areas, isolate the leak zone where possible, and notify tenants or staff. A small roof opening can affect operations, equipment, ceiling systems, and inventory well beyond the point where water is visibly dripping.
Take clear photos and videos from safe locations. Capture the exterior damage from the ground, the location of the leak indoors, damaged contents, and any temporary measures you take. Good documentation can be useful when reporting a claim and when a roofer evaluates the repair scope.
When Emergency Roof Tarping Makes Sense
An emergency tarp is a short-term barrier, not a roof repair. It may be appropriate when a localized area of the roof has been opened by wind, a fallen limb, missing shingles, or failed flashing, and the weather has cleared enough for safe access.
The tarp must cover the damaged area and extend well beyond it. Water does not always enter directly below the visible opening. It can travel under shingles, along roof decking, around penetrations, or through compromised flashing before appearing inside.
Tarping is less suitable when damage is widespread, the roof deck is soft or broken, the roof is very steep, or the roofing system requires material-specific handling. Improper fastening can crack slate, split cedar, puncture a membrane roof, tear shingles, or create more openings for wind-driven rain. In those cases, a professional emergency response is the better choice.
How to Handle Emergency Roof Tarping From the Ground Up
If conditions are dry, daylight is available, and the roof can be accessed safely, prepare before climbing. Use a heavy-duty waterproof tarp large enough to extend beyond the damage on every side. A tarp that is too small often directs water underneath its edges instead of away from the opening.
Wear non-slip footwear, gloves, and eye protection. Use a properly secured ladder on level ground, with a second person holding it where possible. Do not work alone. Avoid using loose rocks, bricks, or other makeshift weights that can slide or become projectiles in wind.
A temporary tarp installation generally follows four principles:
- Cover the damaged area with enough material to shed water downhill.
- Extend the top edge above the damage so water cannot run under the tarp.
- Keep the tarp pulled flat enough to prevent pooling and wind uplift.
- Secure it without driving unnecessary fasteners through undamaged roofing materials.
The upper edge matters most. Whenever possible, the top portion of the tarp should run beneath existing shingles or be secured along a stable section above the damage. This helps prevent rain from flowing beneath the cover. The tarp should continue down the slope past the damaged area, allowing water to drain naturally.
Avoid fastening directly through the center of the tarp where water will collect. Professionals often use wood battens or boards to hold tarp edges in place, fastening them only where appropriate and structurally sound. But the method depends on the roof material and damage pattern. What may be reasonable on an asphalt shingle roof can cause expensive harm to slate, cedar, metal, or membrane roofing.
Never stretch a tarp tightly over sharp, jagged debris or a punctured area without first considering whether the material will tear. A torn tarp can flap in the wind, enlarge the damaged area, and become a hazard to people below.
Common Tarping Mistakes That Create Bigger Problems
The most frequent mistake is treating a tarp as a substitute for repair. Even a well-installed tarp can shift, tear, trap water, or fail during the next storm. Arrange an inspection as soon as possible, particularly after a wind event or when water has entered the building.
Another mistake is covering only the visible hole. Storm damage often includes lifted shingles, loosened ridge caps, damaged pipe boots, displaced flashing, and torn underlayment beyond the obvious area. Water may continue entering through those hidden weak points.
Property owners also sometimes use screws, nails, or staples aggressively across the roof surface. Every penetration can become another leak path. On low-slope commercial roofs, improper foot traffic or fasteners can damage the membrane and complicate the eventual repair.
Finally, do not overlook attic moisture. After stopping an active leak, inspect the attic from a safe location for wet insulation, damp framing, staining, or dripping. Moisture left in concealed spaces can contribute to mold growth, damaged insulation, and deteriorated wood components.
Call for Professional Help When the Roof Is Unsafe or Damage Is Unclear
Emergency roofing service is warranted when water is actively entering, storm damage is visible, shingles or roofing materials have blown off, a tree or limb has struck the structure, or the source of the leak cannot be identified safely. Prompt action matters because water damage can spread quickly through insulation, walls, ceilings, and electrical systems.
A qualified roofer can assess whether tarping is sufficient, locate damage beyond the visible leak, and recommend the right repair for the roofing system. In Fairfield County, that assessment should account for local concerns such as wind-driven coastal rain, ice dams, snow load, aging flashing, and ventilation-related condensation that can resemble a roof leak.
Rick’s Main Roofing provides 24/7 emergency roofing response for residential and commercial properties, with experience across asphalt, cedar, slate, metal, rubber, and other roofing systems. A trained response helps protect the roof without creating avoidable damage to specialized materials or historic details.
After the Tarp Is Installed
Check the interior regularly until permanent repairs are complete. Watch for new drips, water stains, damp insulation, ceiling movement, or a musty odor. If conditions allow, inspect the tarp from the ground after heavy rain or wind, but do not climb back onto the roof simply to make a quick adjustment.
Keep records of photos, invoices, weather conditions, and communication with your insurer. Then schedule a complete roof inspection rather than limiting the visit to the immediate leak. The most helpful next step is a repair plan that addresses the cause of the failure, protects the surrounding roof system, and gives you confidence before the next storm arrives.